Newbie's Guide to Getting Started with Automox API
If you’ve never used an API before and want Automox to be your first (you always remember your first API), then this is the guide for you. By the end of this document you will have made your first API call and can see the results from your environment.
Step 1: Download Postman
Postman is a handy tool for testing out API calls to make sure they work before putting them in a script. They have a freemium version for individuals and small teams that you can download.
They’ve got versions for Windows, macOS, and Linux so it doesn’t matter which OS you are working on.
Install Postman, create yourself a login, and you’re ready for the next step.
Step 2: Find your API key in the console
In your Automox console, click the kebab menu (the 3 vertical dots at the upper right), and then Keys:
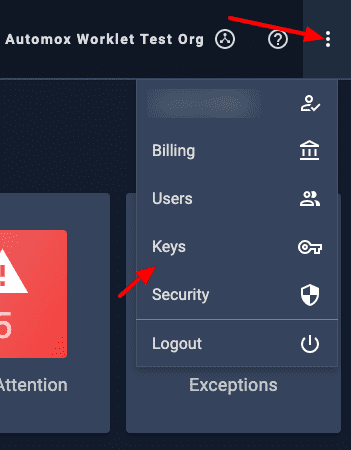
Select your API key (the one on the bottom). There’s a handy copy icon to the right of the API key to get it into your clipboard.

Step 3: Create your first API call
For this exercise, we’re going to use the “Retrieve details for all policies” API call. The documentation for that call is found here.
Open up Postman and click the New button in the upper left, then Request. From there, paste the following command into the Get window:
https://console.automox.com/api/policies
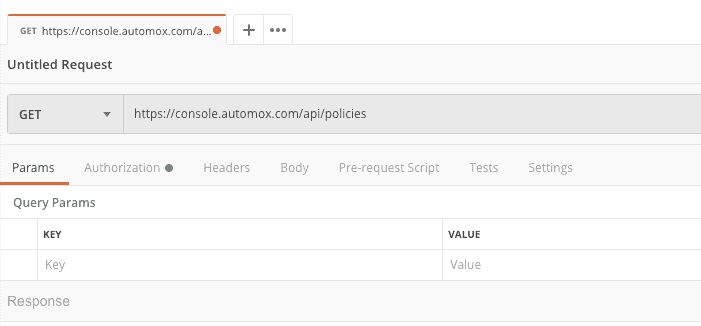
Grab the API key from Step 2, click on the Authorization tab, and select type Bearer Token in the drop-down menu. Then paste your API key in the Token field:
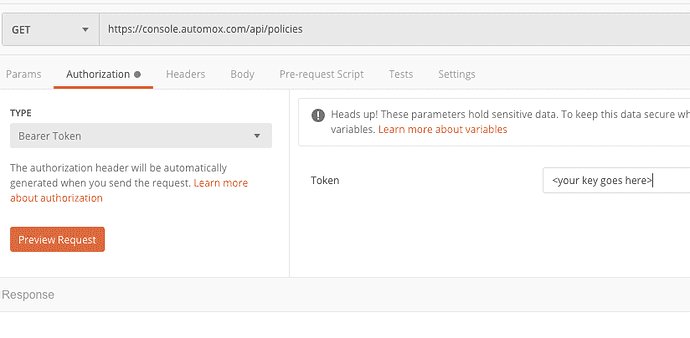
Environment Variables
It's best to use environment variables in Postman to store sensitive information, like your API keys. This will help later if you share your collection with teammates. Please see this article Managing Environments in Postman.
If you only have one Automox organization then you can click Send. If not, you will need to add a parameter to specify which organization you want to pull the policies from. To get the Organization ID (or OrgID) for the organization, go into your console and switch to the organization you want:
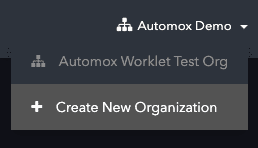
Then the OrgID will be the last part of your console URL in the browser:
https://console.automox.com/dashboard?o=0000
The 0000 is the number we want from the URL (in your case it will be a different number).
Once you have the OrgID, go back to the Params tab in Postman. In the Key field, put the letter o. In the Value field, put the OrgID. You’ll notice that the GET field will update to include ?o=0000 at the end of the API call.
Click Send and then you should see a bunch of code appear in the Body section below the Query Params:
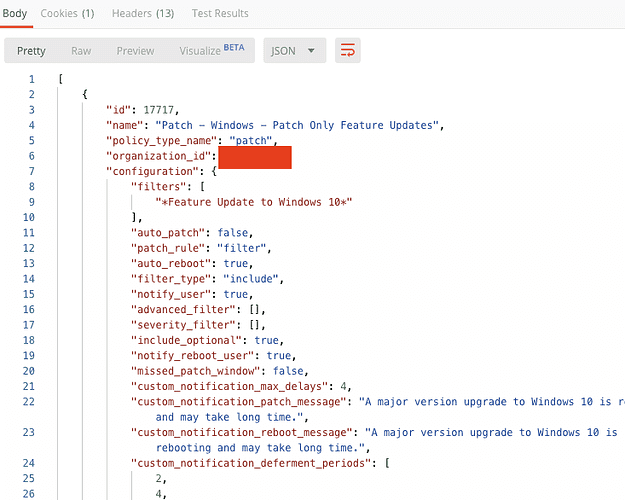
This is all the data you would see if you drilled down into a policy on the console, plus some extra stuff such as internal ID numbers for the policies (PolicyID). But in this case you have all the data from all the policies in a handy JSON format that you can then do additional filtering and sorting on.
If you get any sort of error code, double-check to make sure you copied your OrgID and API Key correctly. If they don’t match up, the API won’t return any data because it doesn’t recognize you as authorized to do so:
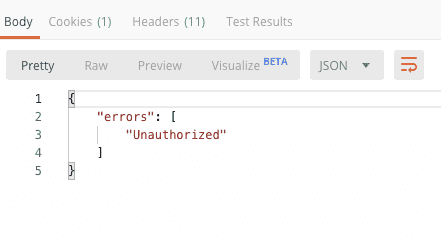
Step 4: Pat yourself on the back
Congratulations, you’ve made your first API call!
Scrolling through the returned JSON will show you each of your policies, with all their associated data, in a tree structure.
Step 5: What now?
Now that you’re no longer an API newbie, you can put your API call into a script and start working with your data. Each of the API calls has example code in various languages to the right of the API documentation page:
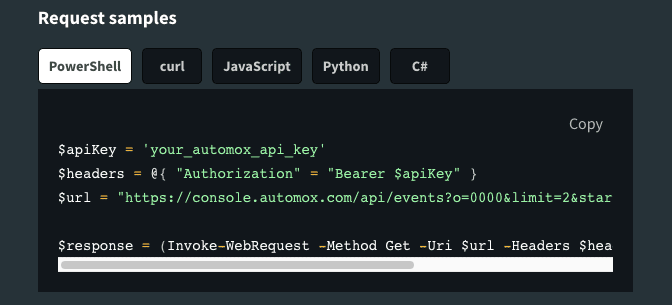
Once you’ve extracted the data you need via the API, you can crunch it for handy reporting. You can either use a tool built for that purpose, such as one of these:
Best business intelligence (BI) tools in 2021
Or you can do the formatting and output directly in your script.
Got questions? Stuck? Contact us at the Community!
Keep Your API Keys Secure!
Don’t include your API key in anything you post to the community! That’s your secret key that you want to keep to yourself to protect access to your data.